Cloud based interactive analysis
Prerequisites
Before starting this lesson, you should be familiar with:
Basic computer usage
Learning Objectives
After completing this lesson, learners should be able to:
Understand interactive analysis platforms, including virtual desktops, Galaxy interactive tools, and Jupyter notebooks for bioimage analysis.
Run bioimage tools, such as CellPose on virtual desktops
Run Galaxy Interactive Tools for bioimage analysis
Motivation
Bioimage analysis requires interactive tools that combine computational power with user-friendly interfaces, enabling researchers to process and analyze complex image datasets efficiently.In this course, we introduce BARD Virtual Desktop, Galaxy interactive tools, providing hands-on experience in deploy bioimage tools to these platforms.
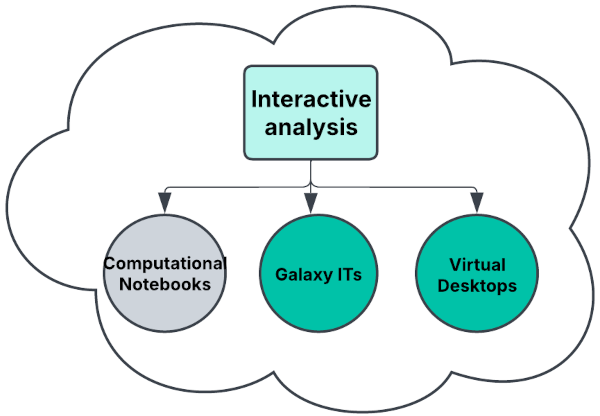
Concept map
Figure
Activities
Using bioimage interactive tools
Show activity for:
BARD Desktops
We will use the BARD desktop EMBL instance.
- Access the BARD Desktop
- Go to the BARD
- Click
Connect with EMBL Guest Account.
- You will be given login details beforehand.
- Username is
trainingXX, replace XX with your own number.- Default password is
tim2025.- After successful log in, you should see your desktop in your browser.
- At the bottom of your desktop is the application dock. We keep multiple versions of software on BARD, but only the latest is shown in this dock.
- To access older versions, click the application menu on the top right corner.
Application -> Development- Each application is in its own container and independent of each other.
- All applications start as the current logged-in user.
- Your home directory is shared among all containers, which means if you need data accessible for all applications, you will need to store them in your own home folder.
- Using microSAM on BARD
- From the dock in your BARD desktop, click
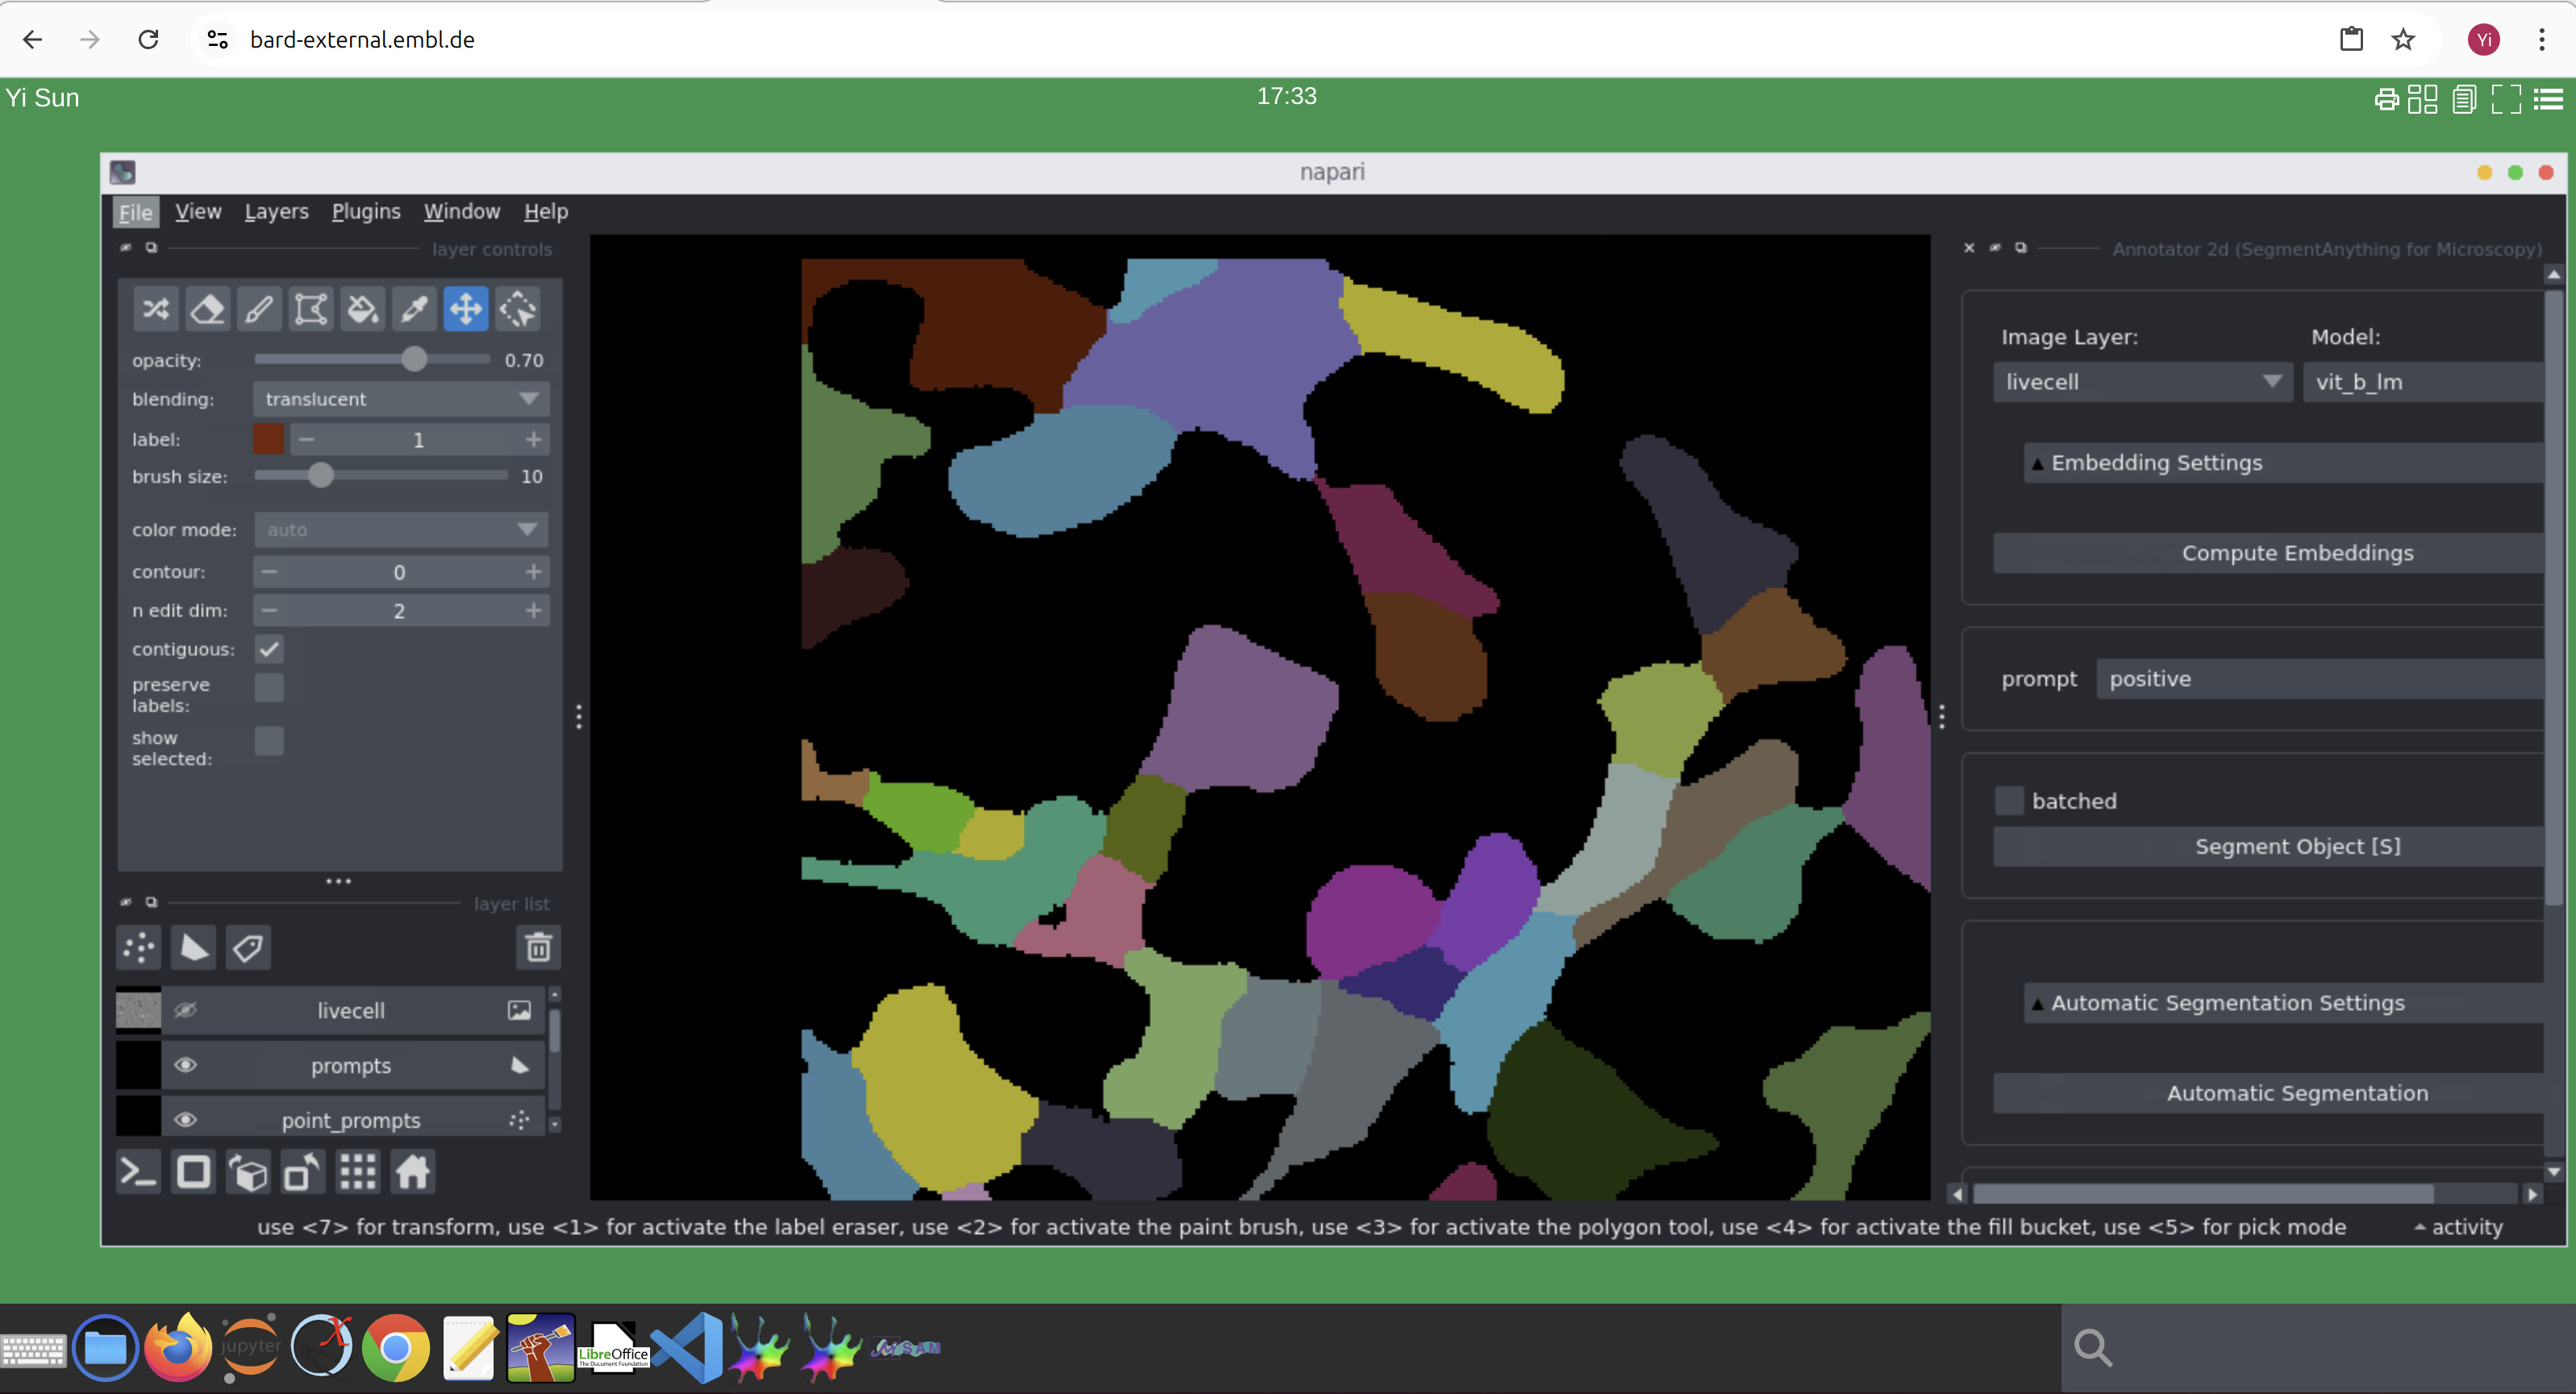
microSAM, since microSAM is based on Napari, aNapariGUI will appear.- Start
Annotator 2DfromPlugin -> Segment Anything for Microscopy -> Annotator 2D.- Go to
File -> Open Sample -> Segment Anything for Microscopy -> LiveCell example data- Click
Compute Embeddingsfrom the right pane.- Click
Automatic Segmentationbutton on the right.- For details on how to use microSAM, please refer to its Documentations
- Segmentation using CellPose on BARD
- Start Firefox from the bottom dock on your BARD desktop.
- Go to the Bioimage archive AI Gallery and click on
Analysed datasets.- Select the first dataset
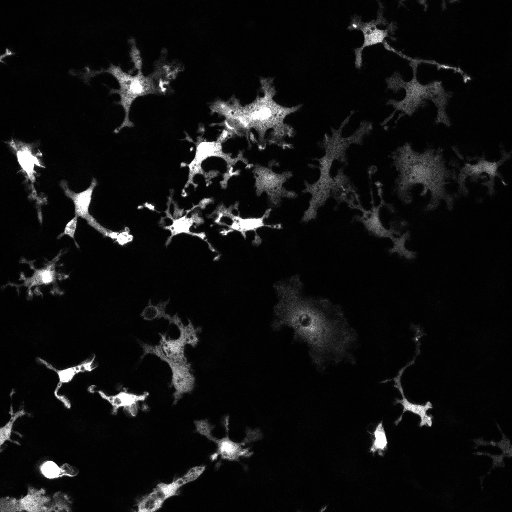
S-BIAD1026, and scroll down to theModel predictionssection.- For illustration purpose, we will download the first image for 2D nucleus segmentation task.
- Click
Downloadunder theOriginal imageto download it. The image will be saved in /home/YOURNAME/Downloads- Click
CellPose 1.1.1.1 (2D)to launch CellPose in 2D mode. Akonsoleterminal will open first,keep it open for logs and debugging.- In the CellPose window, go to
File -> Load image, and select the downloaded image5215c722-0e4d-58a9-a52b-478194c5bab0.png.- Click the
run cyto3button to start the segmentation. You can experiment with different parameters and pre-trained models using the CellPose GUI.
Galaxy Interactive Tools
We will use the Galaxy’s Training Infrastructure as a Service(TIaaS) in the Galaxy EU instance for this course.
- Access the Galaxy Interactive Tool
- Go to https://usegalaxy.eu/join-training/tim-bioimage-tools/ and join the training group. By joining the group, your Galaxy jobs are submitted to a special queue for fast execution.
- You could also go directly go https://usegalaxy.eu without joing the group. This way your Galaxy job will be in the public queue.
- Register an account in usegalaxy.eu .Some tools are only available for registered users.
- Once you get to the Galaxy main page, on the left pane from the tool menu, scroll down and click the section
Interactive tools. Here you will find all interactive tools available in Galaxy EU.- You could also search for a particular tool using the search box on top.
- Upload image to Galaxy
- Download an example image from here
- Ensure you logged in to Galaxy
- On the
Historypane, click the+sign to create a new history.- Click
Uploadat the top of the tool panel of the left of your screen.- Select
Choose local files, and choose the dowloaded image.- Press Start, wait for the upload to finish, then close the window.
- On the right hand side of your browser, in your
Historypane, wait for the image name to turn green.- Segmentation with CellPose Interactive tool
- We will be using an image from Bioimage Archive AI Gallery.
- Click
Uploadfrom the Galaxy tools menu.- Select
Paste/Fetch datain the pop up window, paste the url https://www.ebi.ac.uk/bioimage-archive/galleries/assets/example-images/5215c722-0e4d-58a9-a52b-478194c5bab0.png, start the upload and close the window.- Click
Toolsagain from the menu on the left.- Search
CellPosein thesearch toolsbox, and clickCellPose interactive- Select the uploaded image as input to the
Imagesdropdown,and clickRun Tool,- Monitor the blue info box on the next page, which will inform you when the Interactive Tool is accessible and provide you with a link to access it. This could take a while.
- If you navigate away from this page, you can view your running Interactive Tools from the
Interactive Toolsmenu item in the menu of the left.- Click the
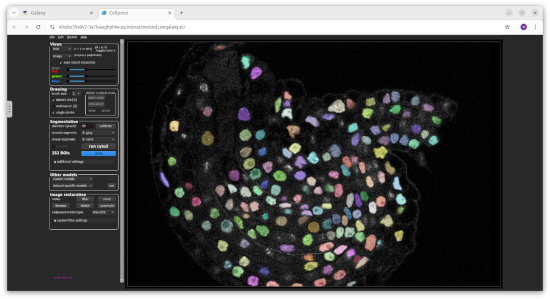
Openlink to display CellPose in a new browser tab.- Once you are in CellPose, go to
File->Load image, navigate to/home/cp_working_dirand select the image.- Click the
run cyto3button to start the segmentation. You can experiment with different parameters and pre-trained models using the CellPose GUI.- View image with the Napari interactive tool
- Click
Toolsfrom the menu on the left.- Search
napariin thesearch toolsbox, and clickRun Napari interactive tool- In the Galaxy center pane, select the uploaded image from the
Imagedropdown, and clickRun tool.- Monitor the blue info box on the next page, which will inform you when the Interactive Tool is accessible and provide you with a link to access it. This could take a while.
- If you navigate away from this page, you can view your running Interactive Tools from the
Interactive Toolsmenu item in the menu of the left.- Click the
Openlink to display napari in a new browser tab.- In the Napari window, go to
File -> Open Files, go to theinputfolder, select the image and click open.- You should see your image is displayed in your Napari interactive tool.
- To stop the Napari interactive tool, go back to the Galaxy browser tab, in your history, click the
Deletebutton next toRun Napari on data 1.
Deploy bioimage tools containers
Show activity for:
BARD Desktops
In this section, we will demonstrate how to make a custom container available for interactive analysis, using the CellPose container as an example from the previous excercise. We have built and tested our CellPose container locally. To deploy it to BARD, we need to modify the Dockerfile by adding the necessary configurations.
Steps
- Modify the Dockerfile
- Open this Dockerfie
- Have look at the added lines:
LABEL: Since BARD is a desktop environment, it needs to know where to display applications and how to launch them when users click on them. To achieve this, we embed the necessary functions using theLABELinstruction in the Dockerfile.
- The
oc.iconandoc.icondatalabels tell BARD which logo image to use for the application.- The
oc.icondatalabel requires a base64-encoded string of the image file(cellpose.svg). To generate this string, usecat cellpose.svg |base64- The
oc.keywordlabel is used by the web application search engine.- The
oc.catlabel defines the category of the application in BARD. This helps organize applications within the BARD desktop environment.BARD has these categories ‘development’, ‘office’, ‘education’, ‘utilities’.- The
oc.templatelabel specifies the name of the template to use in BARD. It corresponds to the base image used in the FROM statement of the Dockerfile. If the value is incorrect, it won’t prevent the container from running, but the application may not function as expected in the BARD environment.- The
oc.namelabel specifies the name of the application.- The
oc.displaynamelabel defines the name displayed in the BARD desktop.- The
oc.launchlabel is a unique X11 window class name that BARD uses to identify the application window. To find out the name, runwmctrl -lx- The
oc.pathlabel specifies the path to the application’s binary executable inside the container. This tells BARD where to find and launch the application.- The
oc.argslabel specifies any additional arguments that should be passed to the command defined in oc.path when launching the application.- The
oc.applabel must be always set toapp- The
oc.showinviewlabel instructs BARD to place an icon of the application in its dock.Make app icon images available. Line 66,67
RUN if [ -d /usr/share/icons ]; then cd /usr/share/icons; /composer/safelinks.sh; fi
RUN if [ -d /usr/share/pixmaps ]; then cd /usr/share/pixmaps; /composer/safelinks.sh; fi
ENVvariables. Line 69-72
ENV APPNAME: The name of the application.ENV APPBIN: The binary executable of the application. In the CellPose example, we launch CellPose within a Konsole terminal (/usr/bin/konsole) to monitor the output in real-time.ENV APP: This is the same asAPPBINENV ARGS: This specifies the arguments forAPPBIN.To start container as the current logged-in user. Line 89-98
RUN mkdir -p /run/user && chmod 777 /run/user
RUN mkdir -p /etc/localaccount && \ for f in passwd shadow group gshadow ; do if [ -f /etc/$f ] ; then cp /etc/$f /etc/localaccount; rm -f /etc/$f; ln -s /etc/localaccount/$f /etc/$f; fi; done
CMD [“/composer/appli-docker-entrypoint.sh” ]
- BARD Desktop allows users to log in via LDAP or OIDC, so the Docker container must run as the logged-in user. The commands above store the LDAP information and ensure that the logged-in user is available inside the container.
- Deploy to BARD
- As contributors:
- Go to BARD containers repository
- Fork the repository to your own user.
- Create a branch for your container.
- Open a pull request(PR).
- As administrator (To deploy apps to your own BARD instance)
- Build and test your container locally.
- Push your container image to a registry, for example, dockerhub, quay.io etc.
- Pull the image from the registry.
- Extract the metadata from image using the below command, (replace with the actual image ID)
$ docker inspect CELLPOSE_IMAGE_ID > cellpose.json- In a terminal,
$ curl -X PUT -H 'Content-type: text/javascript https://YOUR_BARD_URL/API/manager/image -d@cellpose.json
Galaxy Interactive Tools
In this activity, we will explain how to make your container available as an Interactive Tool in a public Galaxy instance. While building a Galaxy Interactive Tool requires some knowledge of XML and server administration, which are beyond the scope of this exercise, we will walk you through the essential steps to complete the process.
Things to know
- Refer to Galaxy tutorial, if you would like to lear how to build and configure an interactive tool.
- Galaxy EU instance (https://usegalaxy.eu)
Steps
- Galaxy Interactive Tools require certain dependencies. To simplify the setup, we recommend using one of the base images available here. These images come pre-configured with all necessary dependencies, making the process more efficient and reducing setup complexity.
Have a look at this example, the first line uses one of the base image mentioned.
FROM jlesage/baseimage-gui:ubuntu-22.04-v4.5.2 AS build
- Add the main installation steps to your own Dockerfile.
- Create a startup script for the container
startapp.sh. While not always required, it depends on how your Galaxy XML is structured..Add the following lines to your Dockerfile
EXPOSE 5800
COPY startapp.sh /startapp.sh
RUN chmod +x /startapp.sh
ENV APP_NAME=”Napari”
ENV KEEP_APP_RUNNING=0
ENV TAKE_CONFIG_OWNERSHIP=1
WORKDIR /config
- Build and test your Dockerfile locally. You could refer to this module for building containers.
- Create a public repository for your docker recipe, e.g., Github(https://github.com), and make the repository public.
- Push your image to a public container registry, such as quay.io
- If you would like to make your interactive tool available in Galaxy EU, visit the Galaxy EU repository submit a pull request(PR).
Follow-up material
Recommended follow-up modules:
Learn more: